Can you change the colors of an image using the After Effects editor? How to invert the colors and tones of an image or photo? What do you need to replace one color for another one or change tones of some image in After Effects? In fact, there are many opportunities for adjusting photos in Lightroom Photoshop, and you can make all corrections at your discretion. And it’s pretty simple.
In order to correct the colors, you can use the new photoshop color changer – it’s After Effects. It can help perform any type of editing without filters, however, it is mainly used for video production or graphic animation. With After Effects you can create 4D movie pay animation, create characters, make animation in 2D, 3D, anime or speed up or slow down the video. And the most important advantage of this tool is to completely change the colors of the image so that it can be different from the original.
How to change the colors of an image using After Effects?
It is extremely easy and useful to change the colors of an image or video using Adobe After Effects because in many cases you can improve your clips or shots by up to 85%. Of course, you need to start by opening the After Effects editor.
The best part is that with the After Effects editor, there is no need to download any additional tools or plugins to change some settings of an image, even if you change the after colors of the video, After Effects allows you to download the video even with a transparent background.
Color change tools
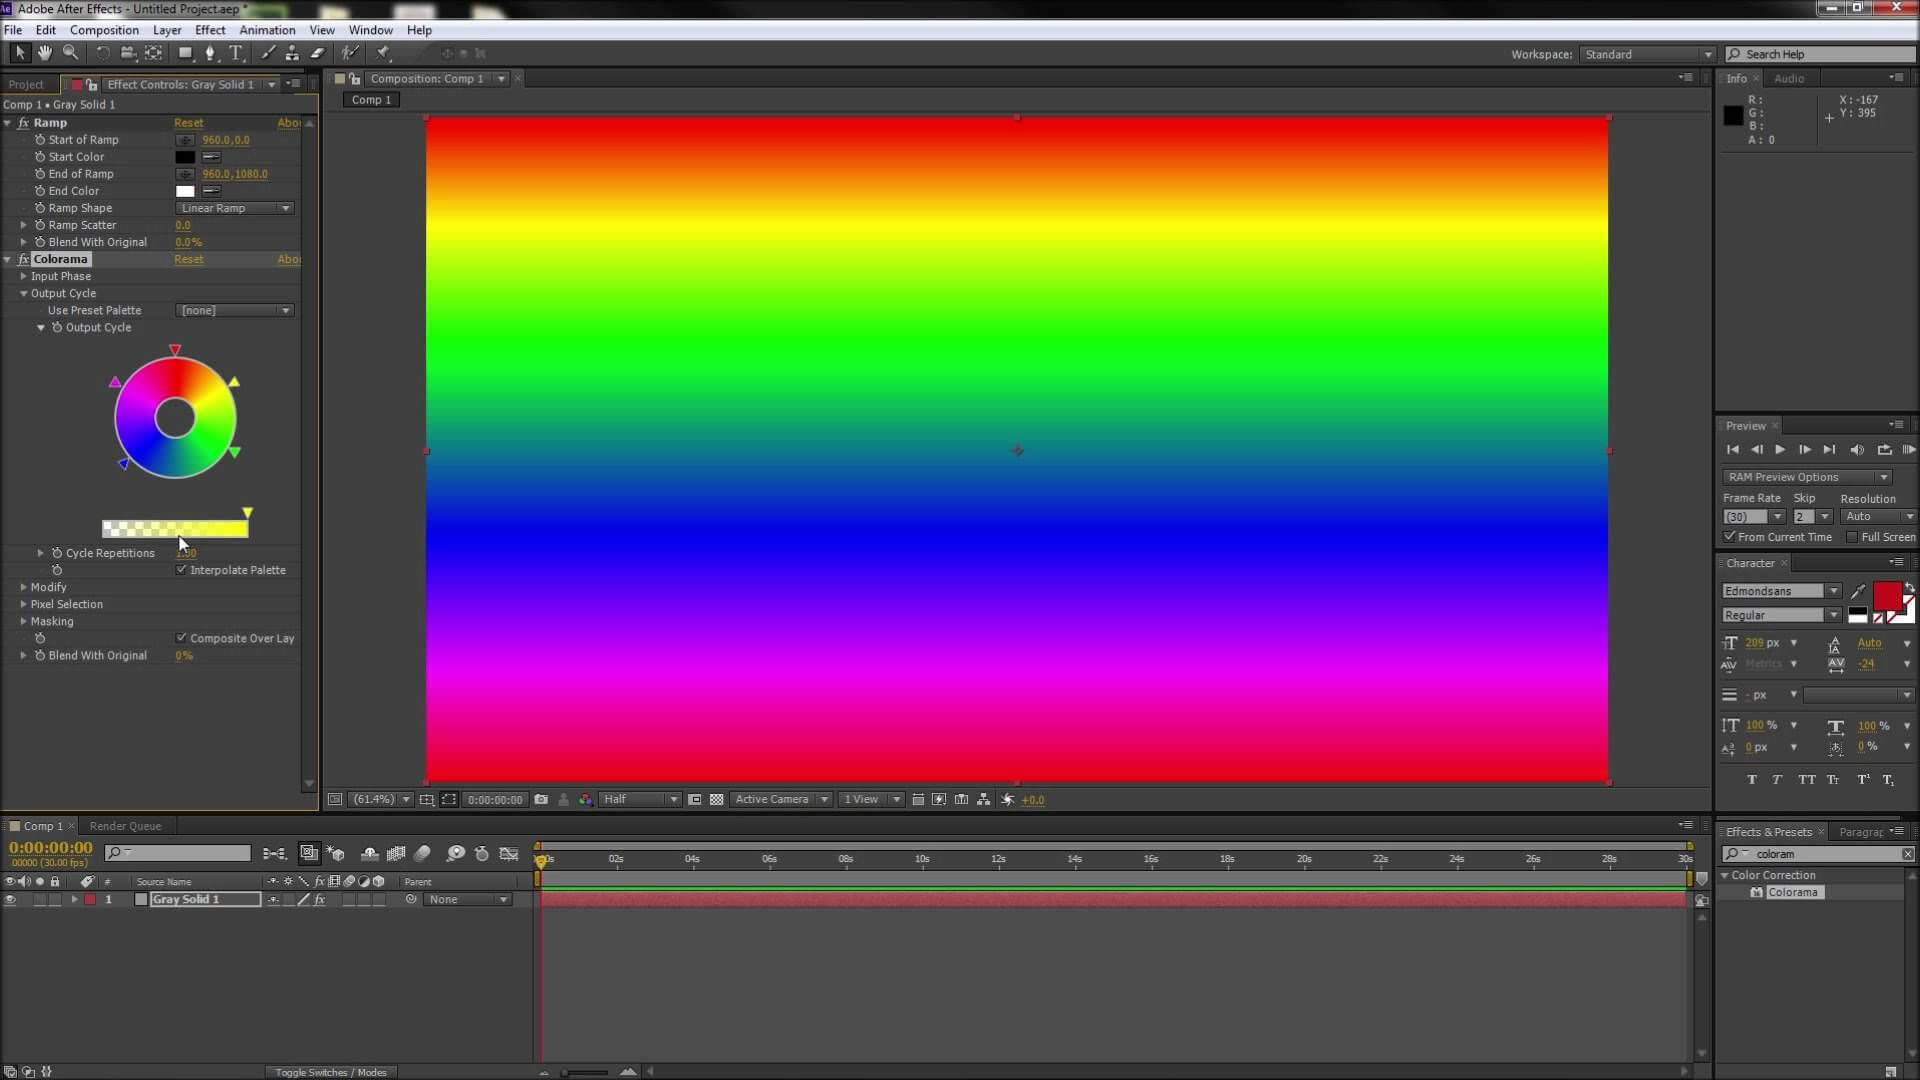
A common way to start editing footage is with Lumetri’s professional color grading tools, which allow you to process footage directly in the Timeline panel. In order to use the Lumetri Color tool, you need to go to the Effects menu. This tool uses GPU acceleration to maximize performance. Its most important options are the adjustment of parameters such as color, contrast and light, using modern high-tech processes and making replacements of some solid colors in your images.
The Color workspace is made not only for experienced colorists, but also for those who have not yet mastered the art of color grading but who want to do it as a professional – you can teach it in a tutorial. You can arrange just simple color corrections or complex Lumetri Looks with intuitive sliders and controls. You can also easily tweak montages or adjust hues with the most modern color correction tools such as curves and color wheels. You can correct videos and photos with equal success – you can change everything you want.
Color correction with curves
The first thing you should be familiar with is the color correction curves, which will allow you to quickly and accurately colorize your images. For example, you have several colored pencils – red, green and cyan, and you need a darker cyan to match the color palette. You can select cyan and use the Hue or Lightness curve to make it darker. This change does not affect other colors in the image – you replace only desired details.
RGB CURVES
Working with them is quite simple – they are curved lines that can be adjusted with the mouse. They allow you to work with both video clips and photos, in just a few steps:
- The main curve controls the brightness. The top right side of the line represents highlights and the bottom left side represents shadows. Decide what you will be editing;
- The main curve setting can adjust all channels at once, or individually – only red, or blue, or green. All processes can be done simultaneously on the same chart by adding control points;
- In order to correct the necessary indicators, it is enough just to click on the curve once – and then move the point along the plane. The direction in which it moves vertically determines whether the image will be lighter or darker. But moving horizontally will allow you to adjust the contrast;
- To cancel a breakpoint, hold down the Ctrl (Windows) or Cmd (Mac OS) key and click the desired breakpoint.
What effects can be adjusted with curves
The Curves group that is arranged by Lumetri Color effect contains adjustment tools that make it easier to perform selective color correction. With dual-axis graphs, you can make next correction:
- Hue by Saturation – Adjusts the number of pixels to define a specific hue in a color range. Saturation levels have been increased using this curve to make someone look less pale. The saturation of the sky color and light can be increased to make the image warmer.
- Hue by Hue – Adjusts the hue of pixels in the selected color range. Useful for correcting colors. For example, this curve can change the color tone of a dress. This curve is suitable for tasks such as changing red to orange or correcting pale skin.
- Luminosity Hue – Adjusts the brightness of pixels in the selected color range. An excellent opportunity to correct, if necessary, the shades and tones of only some colors, for example, blue or purple. Such dimming can add more drama to a frame with a combination of different tones of the same color;
- Saturation Brightness – Adjusts the saturation of pixels in that brightness range. Serves to change the saturation of light or dark tones. For example, this curve can be used to slightly boost the blues within the brightness range.
- Saturation by Saturation – Adjusts the saturation of pixels in the selected saturation range. Serves to bring colors into an acceptable range, such as compressing light or dark tones.
Thus, just by changing the position of the lines with the mouse, you can edit the colors and lighting of your frames as you wish. However, in order to do this quickly, it is enough to purchase ready-made settings from Iuliia Store. This is a great option for those who are used to doing everything quickly and working with the finished product.